Backyard Water Feature

Tips for Adding a Backyard Water Feature

Do you want to enhance the beauty of your backyard by adding a backyard water feature? Water elements, according to experts, are one of the most beneficial improvements to consider for enhancing the charm of your building because of their audio and visual effects.

Water features in the backyard might be modest or enormous, simple or sophisticated. They can be anything from a small accent piece to a major landscape focal point. Your local landscape expert can help you find yourself the best in terms of taste, budget, and the countryside if You want the beauty and mysticism of the move of water in your yard. We mentioned here some tips and thoughts to add a water feature in the backyard.

1. Fountains

A recirculating fountain is the simplest type of water feature to build. In a basin on the bottom of each of these water features, the water gathers and pumps back to the top via a little pump. These are the most economical choices in the backyard for installing a water function.

2. Waterfalls

Waterfalls and streams connect the spaces of your yard by creating an anfractuous setting. They also aid with drainage in terms of functionality. However, it is advised to homeowners to hire a professional because of the engineering involved in a proper installation. As a result, the chances of something going wrong are reduced.

3. Buoyant Stones

A great backyard water feature, such as a pond, can be easily managed by making buoyant stepping stones. These stepping stones are equally captivating and seemingly magical, particularly when the observer believes he or she is walking on water.

For individuals who lack the essential abilities, installing floating stepping stones might be a challenging task. For this water feature design, it’s preferable to engage an expert plumber. Match the color and material of your stepping stones to the surrounding hardscape for a consistent aesthetic.

4. Small Pond

A small pond nestled among your plants and flowers is the ideal way to add another level of beauty to your landscape. Believe me, this can be done very simply even if you do it by yourself. To accomplish so, select anything that will act as a “dispenser” of water into your pond. The best method to do it is by using a clay pot. Then, at the pond’s base, capture water using a laundry tub (or something similar).

5. Lights in the Backyard

After the sun goes down you need not let the beauty of your water feature fall. Install landscaping lights to ensure that your pond, waterfall, or other water feature is visible at night. The effect of twinkling light cascading over the rippling water will also appeal to you.

Just hire a professional if you want a high-end lighting design to complement your water feature. However, using pathway lights or LED lights to light your water feature is a simple solution. In this way, highlight your landscape’s most prominent feature. Make it sparkle.

Visit our website for more tips about backyard water feature

PEX Pipe

All You Need to Know About PEX Pipe

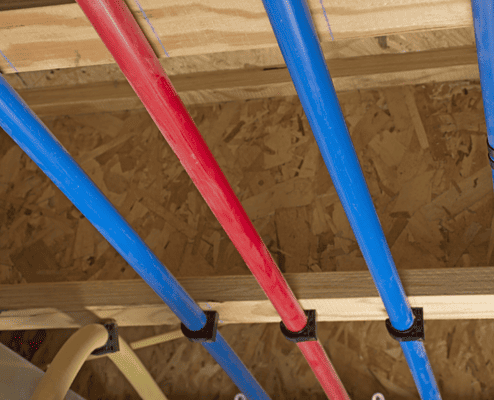
As you know that PEX  is rapidly being chosen in new development and restoration projects to substitute metal and strong aluminum water supply pipes. While coils of blue and red PEX pipe are frequently seen in plumbing sections of home improvement shops. Many people are unaware that this colored tubing enables them to fix broken water lines. you have to read continuously to learn everything about PEX, covering its many uses, locations, and methods of application. it can also help you to study the material’s strengths and disadvantages.

PEX Types

All types of PEX pipes do not have the same properties. It is presently produced utilizing three different methods. This technique produces pipes with various degrees of cross-linking that are suitable for drinking water applications. Some sorts of pipes that you should be aware of are listed below.

Engel Type

This method attaches molecules while extruding amorphous polyethylene. This is a method of “hot” connection. With roughly 85 percent cross-linking, this method provides the highest cross-linking of all PEX types. This amount of cross-connection offers elasticity and heat and elastic memory by delivering warmth to the tube’s kinks.

Silane Type

Following the extrusion process, PEX-b tubing is linked to a hot plate or steaming sauna. The connection rate is usually between sixty-five and seventy percent. The technique isn’t as consistent as PEX-a, and it lacks the thermal memory that enables kinked tubes to be reformed using a heat gun.

E-beam Type

PEX-c then uses a beam of electrons to change or connect the chemical structure of the tube. To achieve seventy to eighty percent cross-linking, PEX-c requires multiple crossings below the beam. Oxidizing discoloration (from natural white to yellow, without adding color) and increased rigidity are side effects of the treatment.

Expanding Property

PEX extends and relaxes much more than copper, thus there is no need to overstretch it. Allow a little gap between the fasteners for it to fall. As shown, including a loop to allow for a contraction over long runs is a wise decision. Another advantage of looping is that if you make mistakes and need extra tubing, you may remove it from the loop. Additionally, because PEX extends and shrinks, drill bigger holes into studs or joists to enable the pipe to move freely. Additionally, avoid using metal straps to secure it. Rather than that, use plastic straps.

Corrosiveness

PEX pipelines are almost impervious to corrosion having an exception for copper or steel pipes. Corrosion has the potential to create leaks and damage to the drinking water supply, which is especially hazardous. There are so many different types and sizes of PEX pipes available that it may be difficult to choose the right one for your specific application.

Flexible property

The PEX pipe may be kept on the spool and does not have to be cut or soldered before installation since it is pre-cut. The flexibility of PEX pipes makes it simpler to transport, handle, store, and install than other types of pipe s.For more information, feel free to contact jam plumbers


How to Fix a Leaky Faucet

How To Fix a Leaky Faucet In Portland?

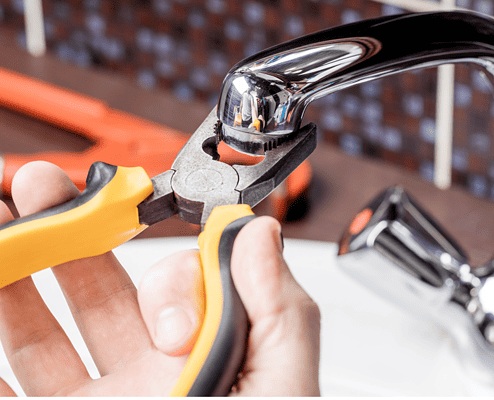
If you are annoyed by a leaky faucet and don’t know how to fix your leaky faucet living in portland we are here to guide you. Preventing leaky faucet problems is one of the most common types of calls Portland and Lake Oswego plumbing professionals get. Maybe a leaky faucet is driving you crazy and you do is decide on the kind of faucet you have. You might be confused if you should contact a plumber in Portland or Lake Oswego, try the steps below to see if you can repair it yourself.

Basic Steps For How To Fix a Leaky Faucet

1) Make Sure Your Working Environment Is Ready.

A good plumbing job begins with properly preparing the area and collecting the equipment you’ll need, as Hillsboro and Lake Oswego plumbers will tell you. Prepare a space where you may layout the components. Gather the necessary equipment, which typically includes a crescent wrench, multiple screwdrivers, and plumber’s grease.

Apply duct tape to the jaws of your wrenches to keep them from damaging sink fixtures. To clean any mineral buildup on the leaky faucet components, you’ll need a jar filled with distilled white vinegar and a gentle scouring pad. Turn off the water beneath the sink last. Place a cloth over the drain to ensure you don’t lose any faucet components. this is one of the basic steps to fix a leaky faucet

2)  Specify The Kind Of Faucet.

In general, there are four types of leaky faucets: ball-type, ceramic disc, cartridge or sleeve, and compression. The first three types of faucets have a single handle that rises to open the water valve and maybe pushed right or left to adjust the water temperature.

Ceramic disc faucets include a ceramic cylinder under the handle, while ball faucets use a ball-shaped component directly beneath the handle. Cartridge faucets, also known as sleeve faucets, use a long, thin cartridge instead of the ball in a ball-type faucet. To distinguish between ball-type, ceramic disc, and cartridge faucets, you may need to remove the decorative handle cover.

3)  Conduct Appropriate Repairs According To The Type Of Leaky Faucet.

The second thing you do is decide on the kind of faucet you have. Here is a look at the various faucet-type and how can fix these various faucets leaks

  • Compression Faucets

Wearing seat washers or o-rings cause most compression faucet leaks. Remove the ornamental cap from the top of each faucet to access the seat washers. Using a Phillips screwdriver, remove the handle screw. Remove the handle and the packing nut with your crescent wrench. The stem must also be unscrewed. To replace the seat washer, remove the brass screw that holds it in place. Prepare new seat washers with nontoxic plumber’s grease.

  • Ball-type Faucets

This kind of leaky faucet contains several complex parts. Instead of tearing their hair out trying to locate the faulty components, many homeowners just replace the entire mounting. The procedure is the same as previously, except that a ball-shaped faucet must be dismantled by a needle-nose pin.

  • Ceramic Disc Faucets

While the ceramic cylinder in a ceramic disc faucet is seldom needed, the neoprene seals will need to be replaced. First, tip the valve back to access the base’s set screw. Remove the set screw and the bottom cap to remove the hose (the escutcheon cap). The ceramic cylinder is held in place by three screws; remove them to reveal the neoprene seals underneath. Remember to clean all parts with white vinegar and a cleaning pad before assembling. When you’re ready to test your work, carefully reopen the faucet. Too much water may damage the ceramic disc.

  • Cartridge Faucets

The rubber o-rings are like a compressor or ball-type valves. To get to the o-rings, dismantle the valve. Notify me of updates to this page. Cut off the old o-rings using a needle-nose pin and a knife. Generally, the cartridge should be changed; just remember to bring the old one with you to the hardware shop.


This is all about how to fix a leaky faucet Visit our website for more information


How To Repair PVC Pipe In Tight Spaces

How to Repair PVC Pipe in Tight Spaces [7 Steps to Follow]

Have you got your PVC pipe damaged and wondering How to repair PVC pipe in tight spaces? Here we have explained it in 7 steps to repair PVC pipes in tight spaces:

  1. Stop the flow of water.
  2. Make a drip pan or bucket.
  3. Fix the leakage
  4. the pipe connection should be sealed
  5. Ensure that any loose fittings are tightened.
  6. Repair the pipe that has been damaged.
  7. Re-start the water and check it.

1. Stop the Flow of Water

Make sure the water is shut off in the area where you’ll be working on the pipe. Turn the valve a quarter turn to the right until the water turns off.

2. Make a Drip Pan or Bucket

Place a small basin beneath the leak spot if space allows avoiding spilling of water around. If you’re working in a tight space, wear knee protectors to stay protected from harm.

3. Fix the Leakage

Use your degreaser and cleaning cloth or a house cleaner to clean the region of the pipe that leaks. Make sure to wipe the sealant off thoroughly after application to ensure proper adhesion. Allow the area to dry for a few minutes. Once the epoxy has dried, remove it and mix it according to the manufacturer’s instructions.  After that, add epoxy glue to the damaged area and allow it to cure for 10 to 15 minutes

4. The Pipe Connection should be Sealed

Pipe connections are mostly the areas from where the leakage is seen. You’ll have to replace the fitting if it’s twisted or damaged. Remove the fitting connection and apply epoxy to the cracked region if the pipe has a crack at the fitting. Before applying the sealant, make sure it is clean and that it has had time to dry.

5. Ensure that any Loose Fittings are Tightened

If the water is coming from a loose connection, tighten the connection with your wrench or screwdriver. Tighten the male fitting first by twisting it to the right, then tighten the female fitting. To protect the fitting from shifting, make sure to grasp it tightly. Next, as much as possible, tighten the female fitting to the right. Examine the connection for any sort of leaking once you’ve fastened the fitting.

6. Repair the Pipe that has been Damaged

If a PVC pipe is damaged beyond repair, it will need to be replaced. Since you’re working with limited space, you’ll need to use the smallest saw to cut the pipe away from the fitting. Start by loosening the pipe at the connector. Then grab your cutting tool; a small oscillating saw is the best tool for this job. Be sure to use no more than a 2.5-inch to the 3-inch attachment for the saw, or you may find yourself struggling to access the pipe.

7. Re-start the Water and Check it

Finally, turn the water back on and inspect the pipe while running the water to ensure that the leak is gone.

This is all about how to repair PVC pipe in tight spaces. For more information, visit our site

drain maintenance treatment

Drain Maintenance Treatment: How To, Guide

Drains are something that is not given proper importance, although they are used regularly in homes. But when a drain gets clogged, then it is a big issue and a lot of your chores get halted. At that time, many resorts to a plumber. This is preventable, by regularly doing Drain Maintenance Treatment.

How To Do An Effective Drain Maintenance Treatment:

Preventive Maintenance:

Before doing drain maintenance, some other precautions are also a part of drain maintenance treatment. These precautions include:

  • Let the drains do the work they are made for. Do not overburden a drain.
  • Use a strainer as a drain lid.
  • For Shower Drain do not bring your pets under a personal shower. They will shed many hairs. Also, try to comb your hair before the shower as well and pull the hairs that are clogged in the drain.
  • For Toilet Drains: Try to make sure that you are not flushing any card boxes, bigger toilet paper, and sanitary or female health products.
  • For Kitchen Drains: Kitchen drains are probably the most used drains in homes. Make sure that you are not putting any solid waste (Fruits, Seeds, Dough, etc.) in the drain. Also, avoid wasting eggshells, coffee grounds, medications, oil, and grease through the drains. You can put the extra fats or oils in a separate container and then, waste that in a dustbin. Do the same with coffee grounds.

Drain Maintenance Tools:

  • A good-quality plunger is great for unclogging drains.
  • A snake is also very useful in this regard.
  • There are some other tools as well that may require expertise.

Frequent Drain Maintenance:

This drain maintenance treatment can be done every 5 to 10 days or every week. This is the treatment with hot water. The water should not be boiling as it creates a problem, especially on plastic pipes. Give a full flush through your drain and then, wait for 5 to 10 minutes. Then, again give a full flush down your drain. This will wipe all the fats or particles attached to the pipes.

Biweekly Drain Maintenance:

You can do this treatment after two to three weeks. This is done by using Vinegar, Baking Soda, and Hot Water. Mix 100 mL of vinegar with hot water. Put 100 grams of baking soda in the drain and then, after that, put the mixture of vinegar and hot water in it. Wait for some time or in the best case, overnight. Then, flush the drain. This not only cleans and makes the drain bacteria-free but also works as a drain freshener.

Bimonthly Drain Maintenance:

This drain maintenance treatment can be done every month or two. Enzymatic Drain Cleaners are used in this treatment. They are pretty much safe comparatively. These work slowly but are not very harmful to your health and the drain piping. Follow the instructions given properly.

Extreme Maintenance:

This should not be done at all or in extreme clogging, otherwise. Chemical Drain Cleaners are used in this treatment. They are very strong and they can also cause corrosion of your drain pipes as well because they, usually, have caustic ingredients. Wear proper safety tools; Goggles, Gloves, Mask. Strictly follow the instructions written on the product label.

If things get out of hand, consider calling a plumber


main house traps

What you should Know about Outdated House Traps?

Indoor plumbing was first found and used in the 19th century, but it hasn’t been perfected since then. The state of plumbing technology and best practices is always evolving. Now and then, a popular method goes out of favor and must be replaced with a more effective method. The house traps, which was put in many homes, is an example of an outmoded plumbing fixture.

What Exactly is the Purpose of a House Trap?

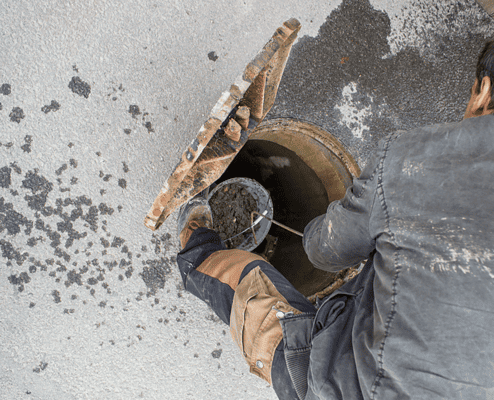
It is, also known as a building trap or sewer trap, is a plumbing device that used to be common in older homes but is now considered obsolete. The home trap is a curved sewer line pipe that continuously traps a tiny amount of water. This water acts as a barrier, keeping sewer gases and vermin out of your house, office, or any other kind of property.

Why aren’t there any more House Traps?

While house traps are beneficial in theory, the plumbing industry has discovered that they can cause more harm than good. The pipe’s material may rust and later on it will become a huge problem for you so that’s not good. The trap may also become blocked with households. And it will be difficult to clear the trash because it is buried below ground. This can create a clog and sewage to back up into the home, causing health problems as well as a pricey disaster for homeowners.

Each sink in your home should have a trap to catch the trash before it reaches the main household trap. It will help you a lot in keeping everything manageable and it is easier to access it too.

Household Traps Issues

If your home still has it and is over thirty years old), keep an eye out for these symptoms that a problem is brewing in your sewer line:

  • Drains that are slow or have backed up. Especially if it happens to many drains simultaneously.
  • Toilets that don’t flush correctly.
  • Noxious odors. The odors are bad and more sewer-like.
  • Back-ups of sewage, especially in the basement

If you find any of the above symptoms just get rid of your old household traps right away.

Repair and Installation of sewer lines and clean-outs

If you notice any signs of a sewage line problem, get yourself a plumber to prevent a potentially dangerous sewage backup in your home. Clean-outs, a more modern approach to eliminate sewer line clogs, can also be installed.

Final Thoughts

House traps are completely out of date nowadays. The materials used to manufacture home traps are no longer used, thanks to current plumbing developments. This is because older plumbing materials deteriorate over time and produce problems. Drying out old home traps is a regular occurrence, resulting in blockages. These drain components, on the other hand, are still in use in thousands of homes across the country. To prevent sewage gases from entering the residence through the main drain, plumbers now utilize more effective techniques and the old versions of it are no longer used. Feel free to contact us.

basement flooding causes

What to do When your Basement Floods?

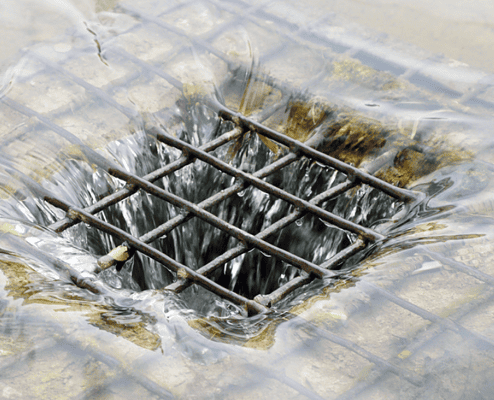
Some of the most typical sources of basement flooding are burst pipes, sewage backups, and leaking water heaters. When your basement floods, you must act promptly to avoid mold and water damage. When you have a flooded basement, follow the actions outlined below.

Never Go Down into a Flooded Basement.

Basement flooding can be dangerous to you and your family in addition to causing property damage. If you come downstairs in the morning to find your basement is flooded, contact an electrician and the restoration experts at Safeguard Restoration straight away.

Shut off the power in your home if your circuit breaker is not in the basement. Otherwise, any electrical equipment or devices that come into touch with water could become harmful. The circuit breaker in your home is most often located in a convenient position, such as the garage.

Get rid of the water

It’s time to remove the water so you can assess the damage once you’ve removed any electronic devices or other items that were in danger. If your basement is flooded, your pump is most likely broken, therefore you’ll need to replace it and utilize it to drain the water. Because a pump won’t be able to remove all of the water from your basement, clean up the rest with a mop and towels. Basement flooding can be avoided by calling safeguards too.

Take Care of Your Wet Objects

You can’t keep any wet stuff in your basement if you want it to dry properly. Everything that became wet, from couches to bookcases, should be moved to a dry location, such as the garage. Hopefully, your insurance provider will cover the expense of replacing the items that were damaged as well as the cost of repairing the basement and eliminating the mold. After the flood, file an insurance claim as quickly as feasible.

The Area Should Be Dried

Your basement isn’t going to dry out on its own after basement flooding. You’ll almost certainly need to purchase or hire fans, as well as industrial blowers. You can use a dehumidifier to eliminate extra moisture, speed up the drying process, and reduce the possibility of mold growing in your basement. Safeguarding Restoration can help you recover your basement with these goods.

Take Preventative Measures to Avoid Mold Growth

Mold thrives in damp, dark environments and can grow during basement flooding. Mold can be dangerous to your health, and if you find mold in the weeks following the flood, you may have to remove large chunks of drywall. Safeguard is the company you call if you need help cleaning up a damaged area.

Floods in the Future

Try to determine what triggered the flood in the first place after it has occurred. Have you had a bad storm that flooded your lawn and flooded your basement? Is your foundation prone to cracks? Is your sump pump in need of replacement or an upgrade to a modern model? To avoid future floods, speak with a professional about updating your basement, fixing your foundation, or changing your landscape and gutters.

Basement floods are inconvenient, but you can take action to rescue your possessions and avoid repeat flooding once they occur. After you’ve completed the steps above, contact waterproofing service centers to have your basement waterproofed.

For more information feel free to contact experienced plumbers at Jam Plumbing


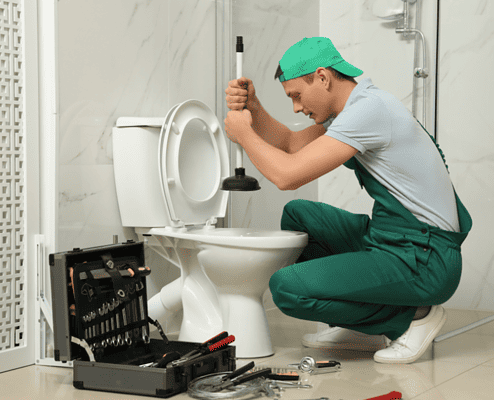
Clogged toilets

Clogged Toilet: How To Unclog A Toilet

Clogged Toilets are no less than a disaster and if you are a big family and you only have one toilet at your home and that too, is clogged. Then, things get even more worrisome. But, with the right actions taken, you can save yourself a lot of time and from much more trouble. By applying these methods, you can easily unclog a toilet. But, before learning how to unclog a toilet, you should know the preventive measures as well can prevent clogging in a toilet.

Preventive Measures:

You should follow these in your home to prevent trouble:

  • The toilet lid should be down and especially if you have kids in your home.
  • If you are getting your toilet renovated or you are just building a new toilet. Then, consider a better design for your toilet as some designs may have poor flowability.
  • Do the Drain Maintenance Treatment regularly.

Hidden Causes:

Some other causes may create a problem but are usually overlooked.

  • There can be a problem with the sewage line.
  • Water Force down the toilet is not enough.
  • There is clogging in the water supply from the toilet tank to the toilet bowl.

Methods For How To Unclog A Toilet:

The first thing that should be done in this situation is, doing a visual inspection of the clogged toilet. This way, you will assess the problem in a better way.

Use Your Hands:

Wear protective gloves or sleeves and then, look in the clogged toilet for any solid materials, like crayons, markers, or toys. If found, pull that out gently and try flushing your toilet again.

Liquid Soap:

You can also use liquid soap for unclogging the toilet. With its lubricant nature, it can unclog the toilet easily. For better effect, it can also be used with hot water. The water should not be boiling. Put an adequate amount (100 mL) of liquid soap in the toilet and then, put half a gallon of hot water after that. Try flushing the toilet again.

Snake / Home-made Snake:

If you have a snake at your home, then that is great. But, you can also make one using any spare aluminum wire or a wire hanger. Bend the wires in the shape of a snake. Put it in the toilet and try to unclog the toilet by breaking the clogged material.

Enzymatic Cleaners:

Enzymatic cleaners are also an excellent choice for unclogging a toilet. They do work slowly but they do work. You need to wait for some time for them to work but it is relatively safe and the risk of damage is low. Follow the instructions given on the label.

Vinegar and Baking Soda:

Put an adequate amount of baking soda in the toilet, followed by a mixture of vinegar and hot water. After that, leave the toilet unflushed for a couple of hours or overnight. Then, flush the toilet. The toilet must be unclogged.

Toilet Brush:

Toilet Brush can also be used for cleaning the debris and unclogging a toilet.

Epsom Salt:

Epsom Salt is effervescent and it will create a bubbly reaction to unclog a toilet. Put a hand-full amount of it in the toilet and wait for it to work.

Chemical Cleaners:

This should be the last resort before calling a plumber. Follow the instructions given properly and do wear protective equipment.

Call Plumber:

Call a plumber if you need any kind of help.