How to Remove a Shower Drain

How to Remove a Shower Drain

In our homes there are some shower drains fixed in bathrooms, kitchens, and balconies. A shower drain is composed of four basic parts:

  • Grid
  • Strainer
  • Vent
  • Trap

The primary function of the shower drain is to drain the wastewater into the sewerage system and to maintain the interior air quality of bathrooms. But sometimes it stops draining wastewater which creates a big hurdle for us. So in this regard, we must know How to remove the shower drain? So that we become able to repair or replace it easily. Before removing the shower drain you must have some basic tools e.g.

  • Utility knife
  • Screwdriver
  • Pliers

Here are the 12 easy steps which help you to get an answer on how to remove the shower drain.

1: Buy some lubricants

The first step is to purchase some lubricants. These lubricants are used to close the shower drain so that we can remove it easily. WD-40 is a highly recommended lubricant.

2: Drying of shower drain

Before applying the lubricant you must dry the shower drain properly with any cloth piece or with a towel. Drying is important because with a wet shower drain the lubricant may not work properly.

3: Clog checking

Check the drain properly and find out if there is any clog or not. In case If you find any clog there then you have to unclog it first and then apply the lubricant.

4: Apply the lubricant

After checking the clog and letting it dry, now apply any sort of lubricant gently on the shower drain as well as put some lubricant inside it.

5: Find the type of shower drain

Mostly, there are two types of shower drains. One is the screw-fixed shower drain and another one is the flat one which is tightened on the floor without any screw. So If it the screw-fixed type then use a screwdriver to unscrew it.

6: Put the pliers

Now, you have to put the head of two separate pliers in two small holes of the shower drain.

7: Clasp the handles of pliers

Most of the shower drains are fixed into the floor just like the screws are fitted. So in this regard, clasp the handles of pliers and untwist them. This step is just like removing a screw with the help of a screwdriver.

8: Untwisting

After grabbing the handles of pliers, start untwisting the shower drain until it is completely separated from the floor.

9: Uplift the Shower drainer

Now uplift the shower drainer with the help of pliers gently to avoid any sort of damage. If you are still feeling difficult to lift it then use a little lubricant again.

10: Use the pliers carefully

While lifting the shower drainer, handle the pliers carefully. Neither you should grab the handles of pliers tightly nor you should grab them too loosely.

11: Examine the shower drain

As you have removed it successfully, now check the shower drainer carefully if there is any rust, clog, dirt or something has stuck in it. Remove these things and try to fix them before rejecting the shower drain.

12: Replace the shower drain

If you find there any severe damage which is not fixable then call a plumber and replace it with a new one.

Here is a guide that helps you how to remove the shower drain. Feel free to contact us.

Best gas water heater repair services

Best gas water heater repair services

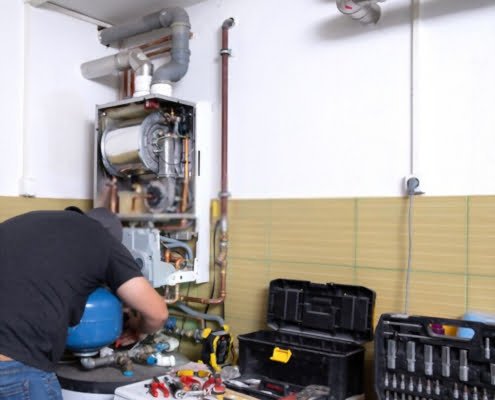
A gas heater heats cold water and stores the hot water in the tank installed inside it. This hot water is later used for various purposes when needed at home, restaurants, hotels, shops, or anywhere else where it is required.

Often people take water heaters for granted. People usually don’t pay much attention to the water heater until it stops making hot water. Although that doesn’t happen very often, we still need to check the heater regularly and use it in a usual way. This article provides information on repairing the water heater if it becomes malfunctioned or needs to be replaced.

This information includes types of water heater, gas water heater repair options, and how you can troubleshoot minor problems independently without needing to call a plumber.

Types of water heater

There are several types of water heater available in the market.

1- Tankless water heater

Tankless water heaters are energy efficient. They heat water instantaneously and on-demand. Some disadvantages include that a tankless water heater provides a low flow rate; usually, three-five gallons a minute, and only one user can use it at a time.

2- Electric heat pump water heater

Electric water heaters use electricity as a source of power. They draw air from the surroundings and heat this air to heat the water stored in them. Electric heaters are usually suitable for use in a warmer climate.

3- Solar water heaters

Solar water heaters are powered by the sun, unlike others which require electricity natural gas to work. They are made up of two components, mainly a solar panel and an insulated storage tank. Solar panel heats the water, and heated water is stored in the tank. Solar water heaters work in any environment and have an average lifespan of 15-20 years.

Gas water heater repair?

Many homeowners prefer to repair a malfunctioning or faulty heater instead of installing a new model. The best time to replace a water heater is at the end of its lifespan. A typical water heater has a lifespan of 10-15 years, whereas a Solar water heater has up to 20 years of lifespan.

But, in case your water heater is just a few years old and is causing problems, there are few ways to diagnose the issue in the heater. Common issues include

  • The pilot light is not turning on or going out when the heater is turned on.
  • The circuit breaker of the electric pump tripping continuously.
  • Heaters and burning elements are not working correctly.
  • Thermostats are breaking, and valves are not functioning properly.

Reduce the repair needs of your water heater

If you want to avoid gas water heater repairs and issues in your heater, you need to maintain it properly. That includes checking it every year before the winter season kicks off. Check properly to see if every component is working properly. Clean the tank to remove any sediments. Replace the sacrificial rod every three years; these rods made up of aluminum or Magnesium become eroded.

You can enlist the help of professional plumbers to help in maintaining the water heater. If you can’t diagnose the problem independently, it is wise to call a plumber before the problem worsens. A plumber can help pinpoint the source of problem and also repair it at a very reasonable price. The plumber can also recommend new heaters according to your house needs in case your current heater can’t be repaired.

Grease Trap Pumping And Cleaning

Grease Trap Pumping And Cleaning

A grease trap is a plumbing device designed to catch grease and solids before entering the wastewater system. Typical wastewater contains small amounts of oil, which can block the drain pipes that later can cause an increase in untreated sewage in the environment.

Grease traps help to reduce oil, fats, and greases that enter the sewage system. Make sure to clean them on time to avoid any annoyance. They help to keep your surroundings clean, environment friendly, and without any unpleasant smell.

Where are Grease traps located?

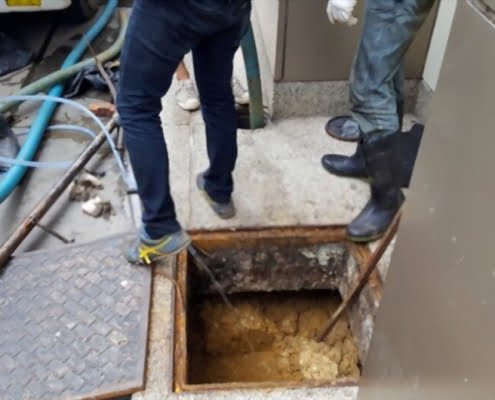
Grease traps are mainly found outside restaurant buildings. Since restaurants produce extra oil and other greasy waste from cleaning dishes that have leftover food on them, look near a restaurant’s dishwashing station. You will see it. They look like a standard manhole with a lid covering them.

What is grease trap pumping?

As mentioned, grease traps intercept the grease and oil coming from kitchen waste before the waste enters the primary sewage system. This happens because grease and oil are light in weight in comparison to water and other waste substances. These lightweight particles float on top of the waste coming from kitchens. Grease traps intercept this waste and allow grease-free waste to enter the main sewage line. After these lightweight solid particles are caught in grease traps, they need to be removed, so they don’t contaminate and block the sewage line. This process of cleaning is called grease trap pumping, where the waste contained in these traps is removed.

How to clean grease traps?

Grease trap pumping and cleaning is a way of removing the grease from these traps. There are numerous ways by which you can clean grease traps. You can do it yourself or ask a professional plumbing company that offers grease trap pumping and cleaning services to do it for you regularly. We will discuss here how you can do it yourself.

First, you have to wait before your restaurant closes and all the dishes and other food-contained items are cleaned. You can clean it early in the morning as well. It doesn’t matter when you decide to clean; follow the steps below.

  1. Remove the lid of the traps slowly and gently. Make sure to not damage the gaskets on the lid.
  2. Stick a ruler in the grease trap to check how much inch’s waste has been collected. Record this in a log sheet.
  3. Remove water from the trap using a pump.
  4. Now start removing grease from the trap using a bucket, shovel, or any other device which suits you the most.
  5. Ensure to check the bottom, sides, and lid of the trap to see if any grease is there. This will prevent quick build-ups and prevent solidifying of waste, which becomes difficult to remove.
  6. Scrub the trap to make sure last time that all the waste has been removed.
  7. Place the lid back again on the grease trap.

Follow these steps if you plan on doing a cleaning of grease traps yourself.

How To Deal With Tree Roots In Sewer Line

How To Deal With Tree Roots In Sewer Line

Are the roots of trees and shrubs troubling you with annoying gurgling sounds coming from your

toilet? Hey there! This article is for you. There is always a misconception that roots cause breaks in their sewer lines. But, it’s not true!

Here, I’m going to share with you 3 effective ways to deal with tree roots in the sewer line.

1- Chop Roots Out Of Sewer Line:

Your pipe is filled with oxygen, water and all kind of nutrients that required the roots of trees and

shrubs to draw towards them.

And the cracks and lose joints of the pipeline resulting in damages.

Here is a temporary but useful way to deal with it!.

Cut the roots out of the sewer line!

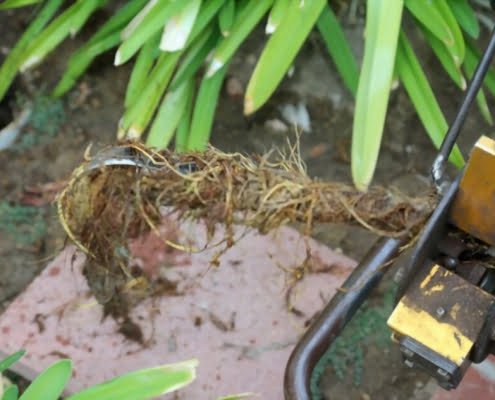
A sewer machine is used to do it.

But as already mentioned, it’s a temporary solution. The roots in sewer line will grow again and can cause damage to the system.

Let’s look into the 2nd solution!

2- Using Salts or Chemical Cleaning:

You can remove the roots using rock salts such as Sodium Chloride or Copper Sulfate.

Pour it into your toilet and flush it. After 10-12 hours you get the results.

But! It has its cons also.

Rock salts can be only for small roots or root hairs. For bigger roots, it doesn’t help.

And chemical cleaning. It can help to clear the pipeline but strong bases can damage the sewage system even more. And make the situation even worse!

And it’s also a temporary fix!

I know you want to know about a permanent solution also.

Let’s get to 3rd point!

3- Repair or Replace:

So, here are the permanent solutions you can apply to deal with roots in sewer line.

If it’s not possible to clear, repair the cracks or lose points.

If the situation is even worse, then it needs a replacement. Partially or Completely according to its requirement.

Guess what?

I have a Bonus tip for you!

“Prevention is better than cure”.

You must have heard it before. Now it’s time to apply here.

Before looking for affordable ways to deal with roots in the sewer line. You can always go for the cheapest option.

While planting any tree near your house or sewer system, try to be careful. So that in future it doesn’t trouble you with thousands of dollars.

Hope it’s helpful!

And you get your solution. For more information, you can always do your research.